
Figure 1 The Development Workflow of SuperMap iClient 8C for Flash
Getting Started with iClient for Flash |
After you installed SuperMap iClient 8C for Flash according to the System Requirements, you can use this product to build map applications with characteristics of friendly interface, high interaction and excellent experience. The development workflow of SuperMap iClient 8C for Flash is shown as follows:
Figure 1 The Development Workflow of SuperMap iClient 8C for Flash
Here is an introduction about how to use SuperMap iClient 8C for Flash to build a simple map application.
Download SuperMap iClient 8C for Flash and unzip the package onto local computer.
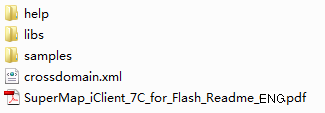
The help folder holds the SuperMap iClient 8C for Flash help documentation.
The libs folder holds script library files of SuperMap iClient 8C for Flash. The script library files are listed in the table below:
SuperMap iClient 8C for Flash library files
| Library file | Function |
| SuperMap.Web.swc |
The core library for SuperMap iClient 8C for Flash includes 7 packages. Objects such as Map controls and other display controls, client layer, map actions, geographic features, service base class, etc., are included in the library. The 7 packages are: com.supermap.web.actions com.supermap.web.clustering com.supermap.web.components com.supermap.web.core com.supermap.web.events com.supermap.web.mapping com.supermap.web.rendering com.supermap.web.resources com.supermap.web.utils |
| SuperMap.Web.iServer7C.swc |
The library supporting SuperMap iServer 8C services, which includes 2 packages: com.supermap.web.mapping |
samplecode_iServer8C holds the SampleCode of SuperMap iClient 8C for Flash. Double click samplecode.html to view the sample code.Please refer to Sample Code Guide.
crossdomain.xml is the cross-domain file. When client applications and services are not in the same domain, the clientaccesspolicy.xml file is necessary. The crossdomain.xml will be held in different paths according to how the services are published. Take Tomcat and IIS as examples:
SuperMap_iClient_8C_for_Flash_Readme_ENG.pdf: SuperMap iClient for Flash Readme file. Before using iClient for Flash, it is recommended that you read this document first.
In Flash Builder4, Select File > New >Flex Project, or right click in Package Explorer and click New > Flex Project to display the New Flex Project dialog box. Input the project name in the Project name text box.
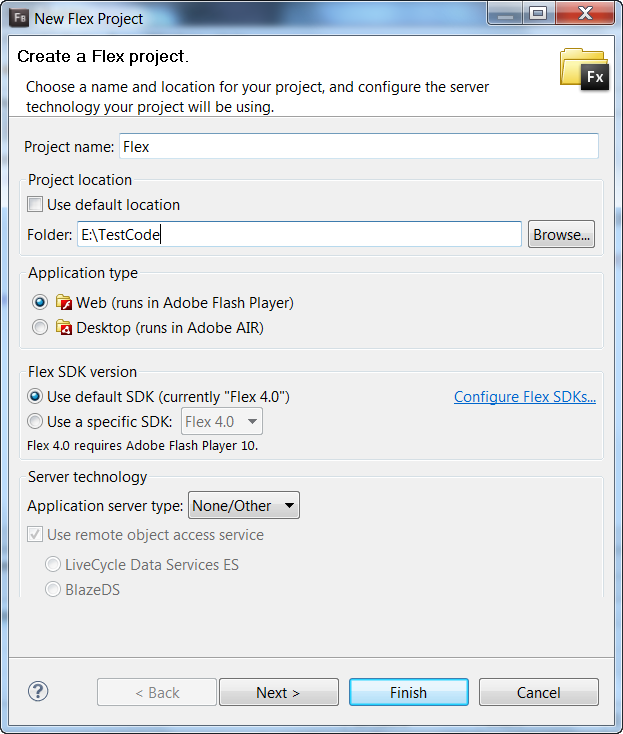
Figure 3 New Project
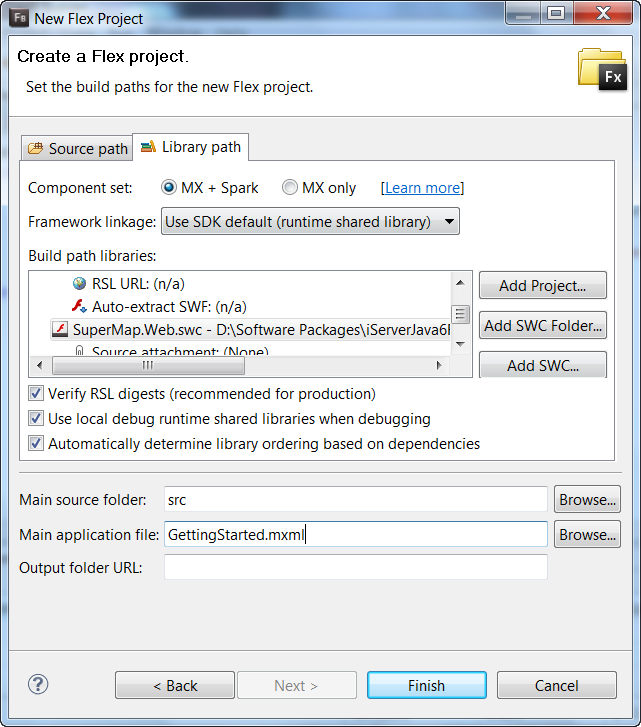
Click Next, and click Next again to go to the New Flex Project page.
Click Library path to add library files. Click Add SWC to siplay the Add SWC dialog box, and click Browse to navigate to the folder where the library files are located. To use client basic map functionalities, add SuperMap.Web.*.swc; to use SuperMap iServer 8C functionalities, add SuperMap.Web.iServer7C.*.swc. For instance, if you want to display maps of SuperMap iServer services, you need to add SuperMap.Web.*.swc and SuperMap.Web.iServer7C.*.swc. Also, you can add the folder where the library files are located to add the library files. Change the name of the main application in Main application name text box.
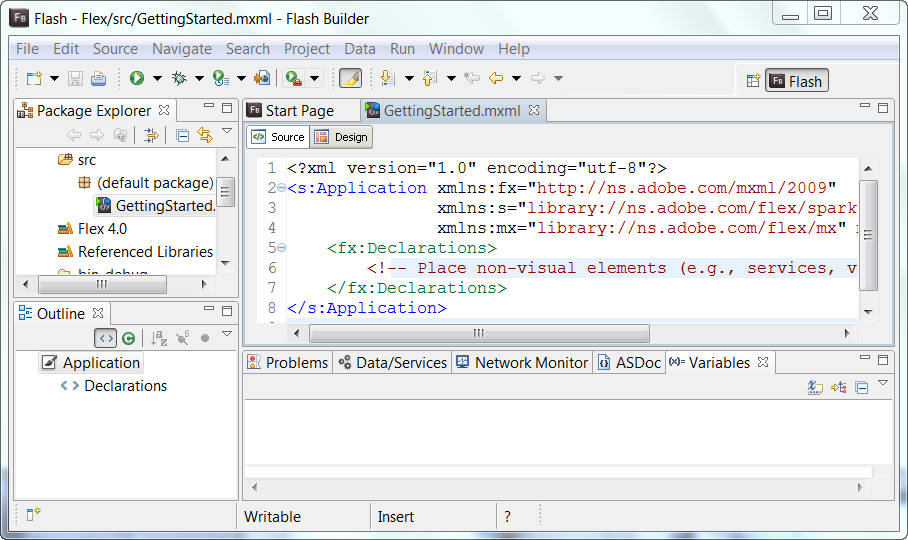
Add code below into GettingStarted.mxml to realize the accessing of tiled dynamic layer of SuperMap iServer 8C service. Code in read is the added code:
| MXML | |
|---|---|
|
|
Figure 6 Access SuperMap iServer 8C map
Note: The map service url in the code is only for demonstration. To guarantee the proper running of this sample, you need to make sure that SuperMap iServer 8C has been installed on the computer, the cross-domain file has been placed in <SuperMap_iServer_Install_Location>\webapps\ROOT, and the service has been started successfully.
Click Ctr+F11 to run the application, or right click GettingStarted.mxml and click Run Application to run it. You can see WorldMap published by SuperMap iServer 8C through service.
Figure 7 Access World Map of SuperMap iServer 8C service